Kuka KR 10 R1100 Sixx
Location
Main Lab, within white cage.
Technical Details
- Maximum Payload: 10kg
- Reach: 1100mm
Axis Data: s
- Axis 1: ±170°
- Axis 2: -190° / 45°
- Axis 3: -120° / 156°
- Axis 4: ±185°
- Axis 5: ±120°
- Axis 6: ±350°
System
- Technical Overview: View PDF
- Official Handbook: Available in Room 131 (handbooks drawer).
Setting up Robot Software on Your Computer (Rhino + PRC)
Step-By-Step Printing Guide
Before Printing
-
Ensure you read the checklist file.

-
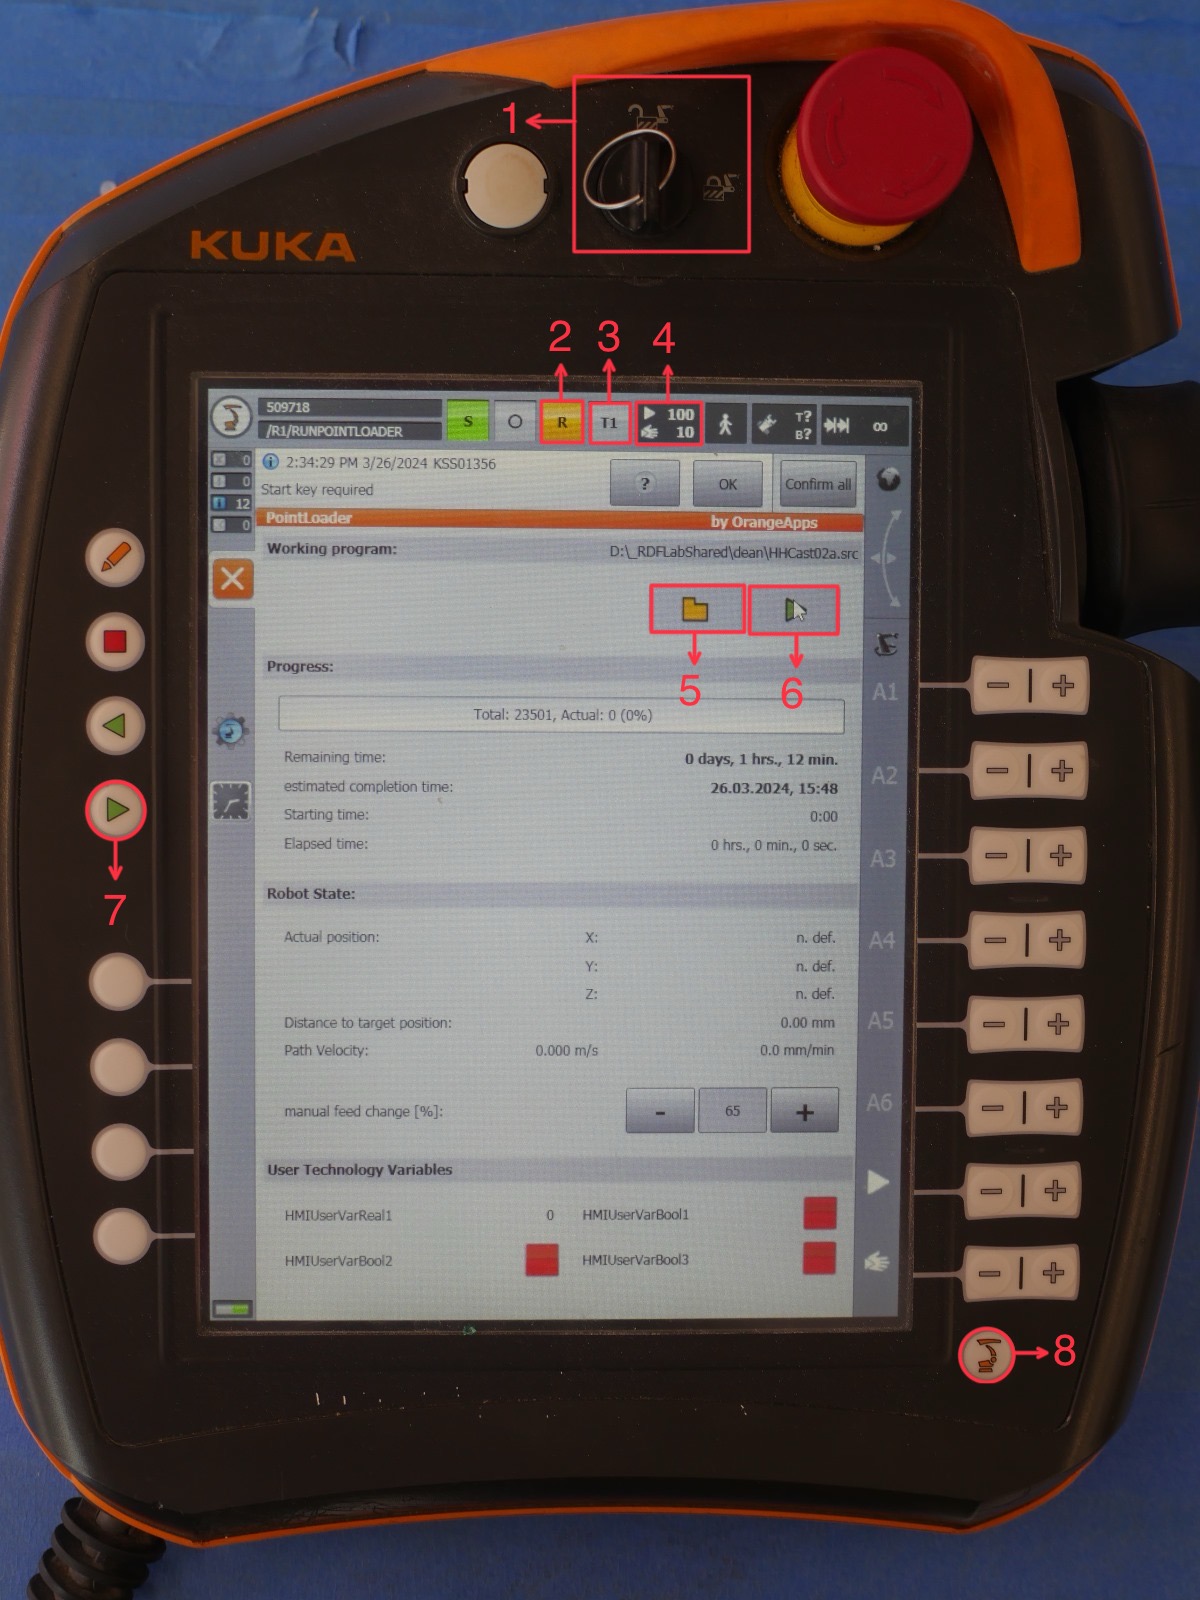
The numbers in the image correspond to the instructions below.
Always run the robot on T1 mode, only the lab manager can run the robot on AUTOMATIC mode.
Uploading the Document to KUKA
-
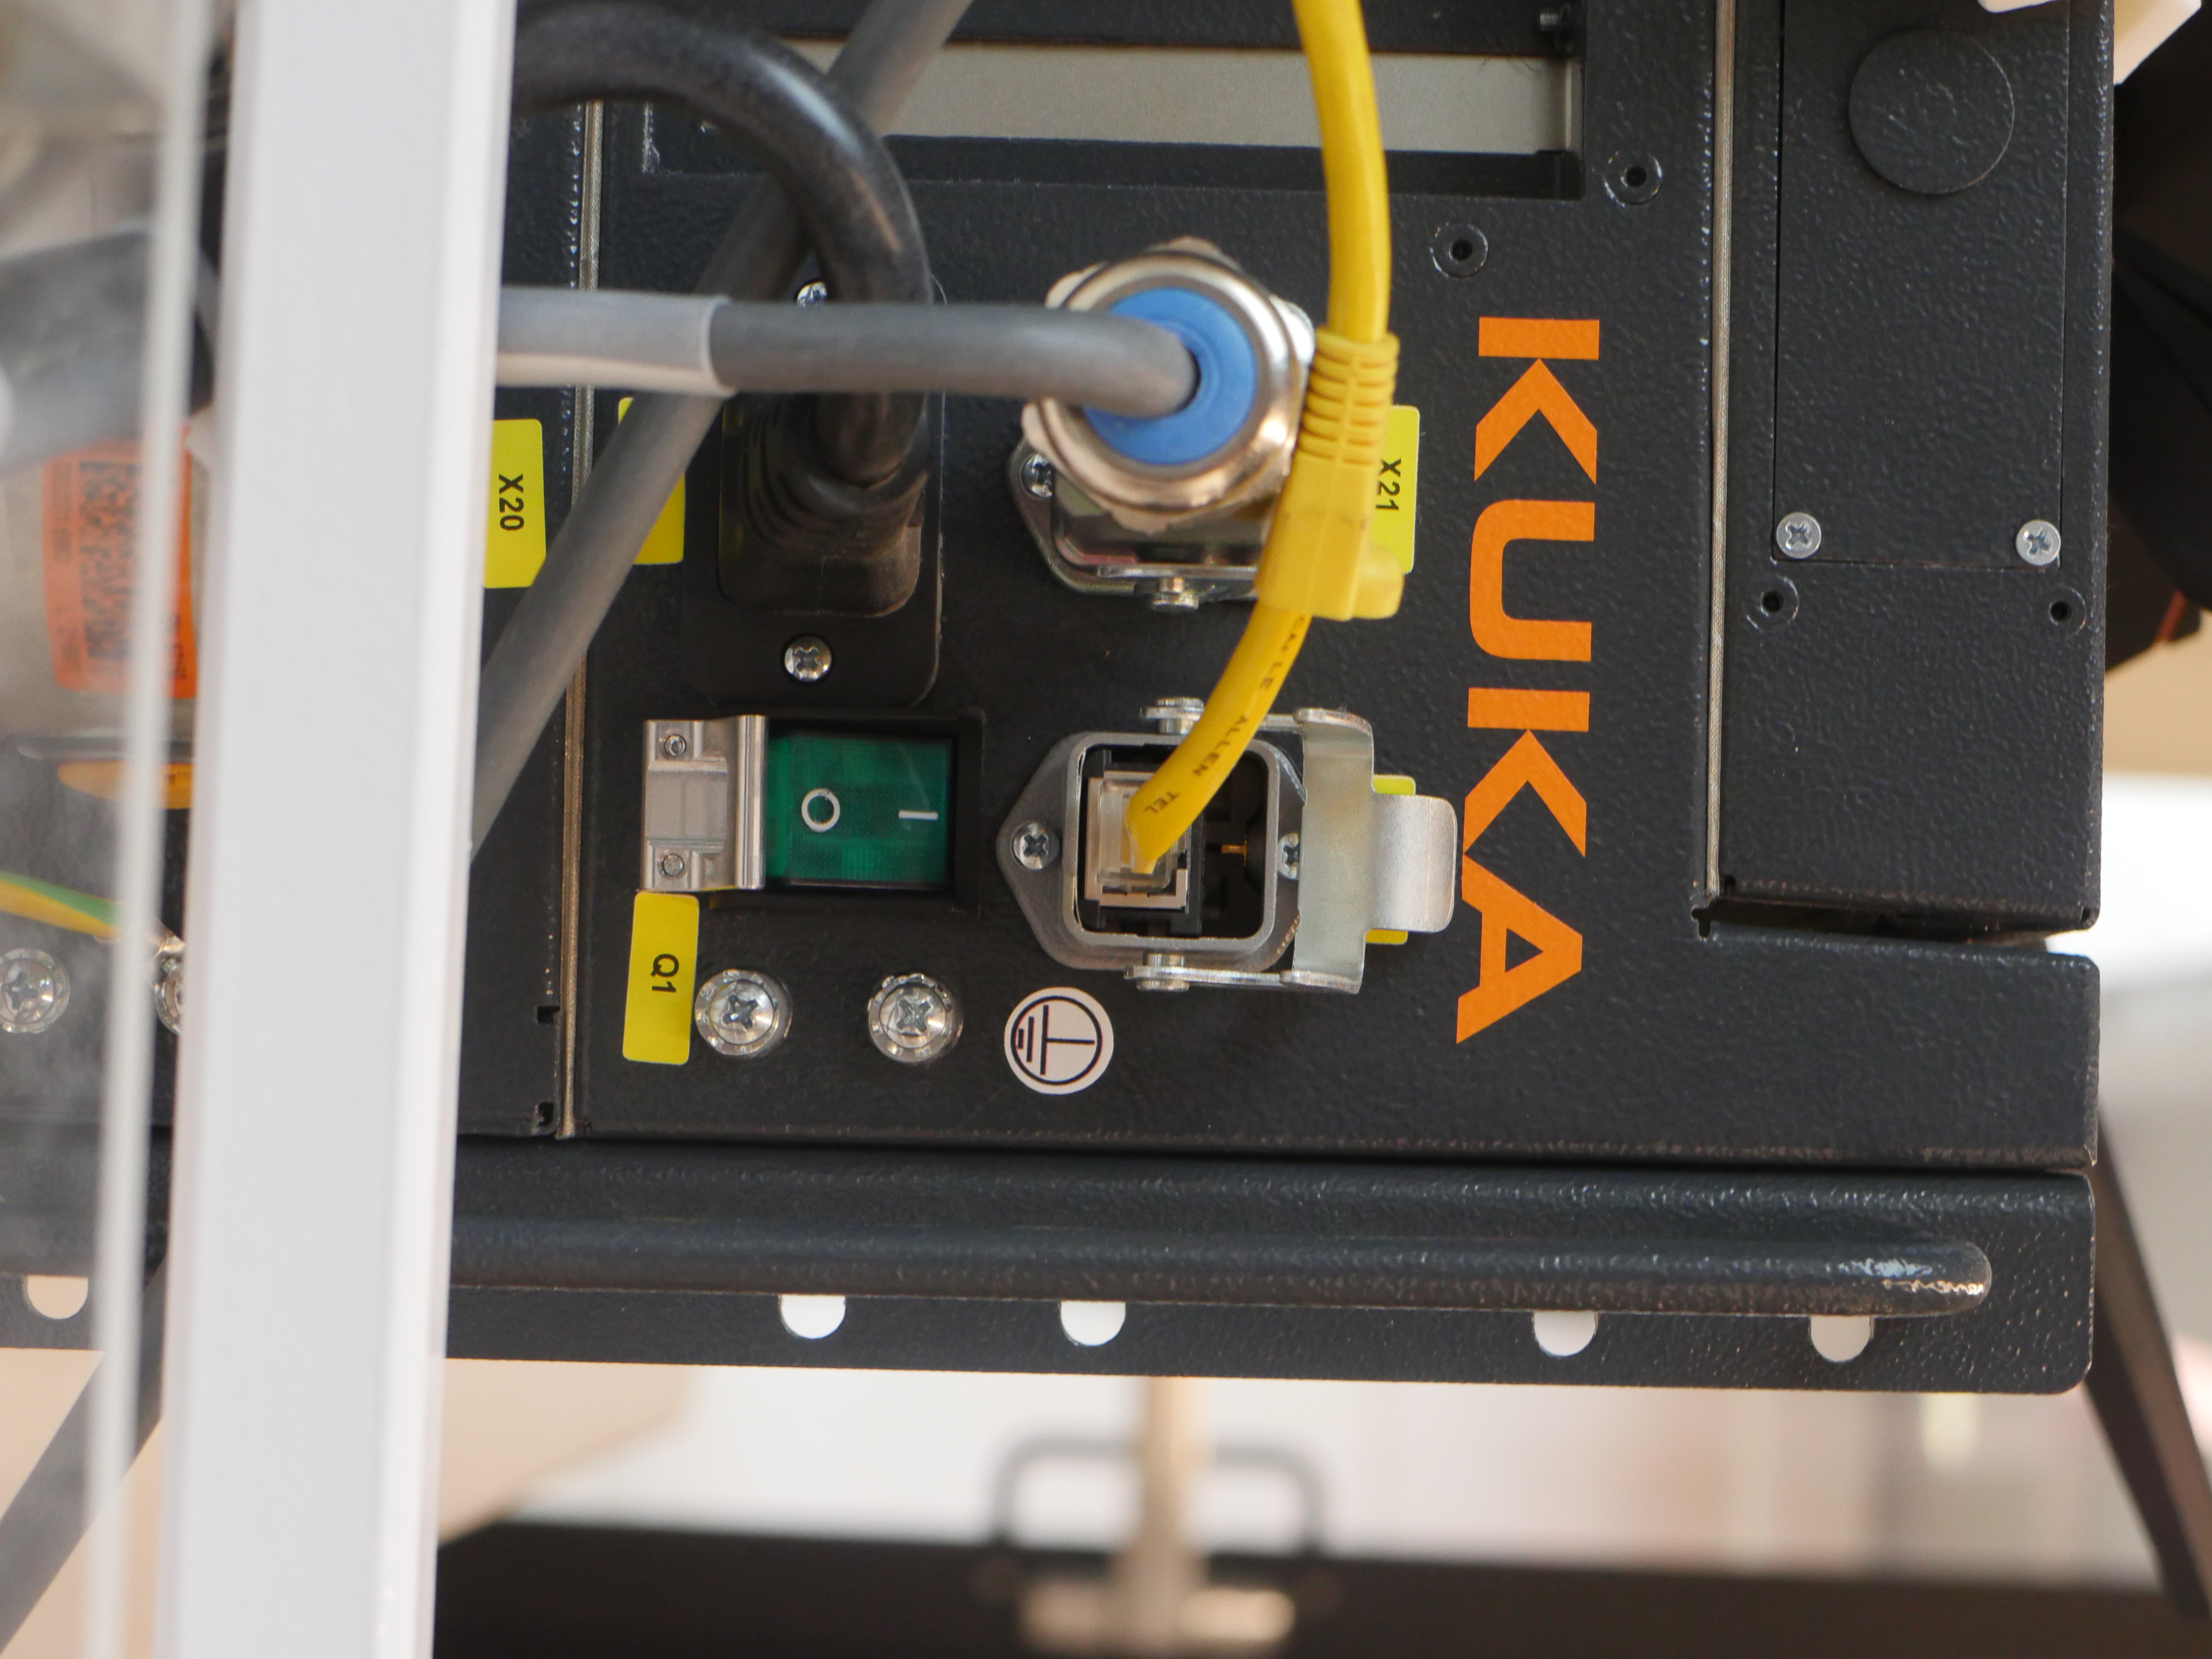
Power the arm using the green switch on the control box. This will also turn on the teach pendant.
- Load the
.SRCfile onto the computer. - Press the robot icon (8) on the teach pendant and select PointLoader. Choose HMI - Full Screen.
- Press the yellow folder icon (5) and select the uploaded file. You’ll see the file name on the main screen.
- Press the play button (6) next to the folder icon to load the file into the robot arm.
- Adjust the robot speed (4) (might start at 0 for safety).
Airpass (Dry Run)
A mandatory check before extruding to ensure the robot arm moves correctly.
- Set the Black switch (1) to T1 mode.
- Hold the safety latch, press play, and ensure the robot moves correctly.
If needed, press reset button (2) → Reset Program.
Hold play button (7) to return the robot arm to home position.
Controlling the Extrusion
- Power on the extrusion panel by enabling the electrical outlet under the robot arm.
- Wait for the nozzle to heat up to the desired temperature.
- Adjust extrusion and fan speed using the panel knobs.
- Ensure a steady extrusion before starting.
- Hold the safety latch and press play button (7) to execute the print.
- Monitor pellet levels to avoid extrusion failure.
Turning Off After Printing
- Turn off the fans and extrusion.
- Power down the extrusion panel.
- Shut down the robot using these steps:
- Press the robot icon (8) on the teach pendant.
- Select Shutdown → Shutdown Control PC.
- Turn off the green switch.
Slicing Information
| Specification | Details |
|---|---|
| File Format | STL, AMF |
| Print Volume | 250mm x 210mm x 210mm |
| Min. Layer Resolution | 0.05 mm (0.002 in) |
| Max Print Speed | 200 mm/sec |
| Nozzle Diameter | 0.4mm |
| X/Y Axis Precision | 0.01 mm/step |
| Z Axis Precision | 0.05 mm/step |
| Filament Diameter | 1.75 mm |
| Machine Dimensions | 420 x 420 x 380 mm |
| Connectivity | SD Card |
Useful Links & References
Operational
Troubleshooting
Teach Pendant
- Run a KUKA Program via USB
- KUKA Arm Tutorials (UT SoA)
- Manual Robot Movement
- Tool Calibration
- Basic KRL Examples
WorkVisual
KUKA|prc
Programming
- KukaPython – A Python library for KUKA control files.
Notes
- KUKA Virtual Remote Pendant is now called KUKA.OfficeLite (~$2000 add-on).