KNK Force Vinyl Cutter
Location
Room 131, 131A Storage
System
Setup:
Materials:
- KNK Force
- Charging Cable (has a sticker on it that says “KNK”)
- WIFI Adapter or Ethernet cable
- Cutter blade
- Cutting Mat
- Pen (necessary for print and cut only)
For WIFI Connection:
Plug the device in and plug the WIFI adapter into it.
For Ethernet Connection:
Plug the ethernet and charging cable only.
Connection:
- Press the start button.
- A blue light will blink (might take up to 1-2 minutes).
- Another light will appear after the blinking:
- If it is Red: KNK doesn’t receive a connectable WIFI signal (WIFI adapter is required).
- If it is Green: KNK is in recovery mode and needs a manual reset. See the instructions below.
- If it is White: KNK is ready for the next step.
- Open WIFI settings from your PC and choose KNK_Force network.
- KNK is now connected to the PC.
Problems with the connection?
Check Article 2.02.2 in the Official Handbook.
Software:
- Inkscape is compatible with the device.
- IP address includes a software with it for cutting.
Workflow with Basics: (7/2/2024 Updated With Visuals)
- Turn the device on and lift the levers up from the back.
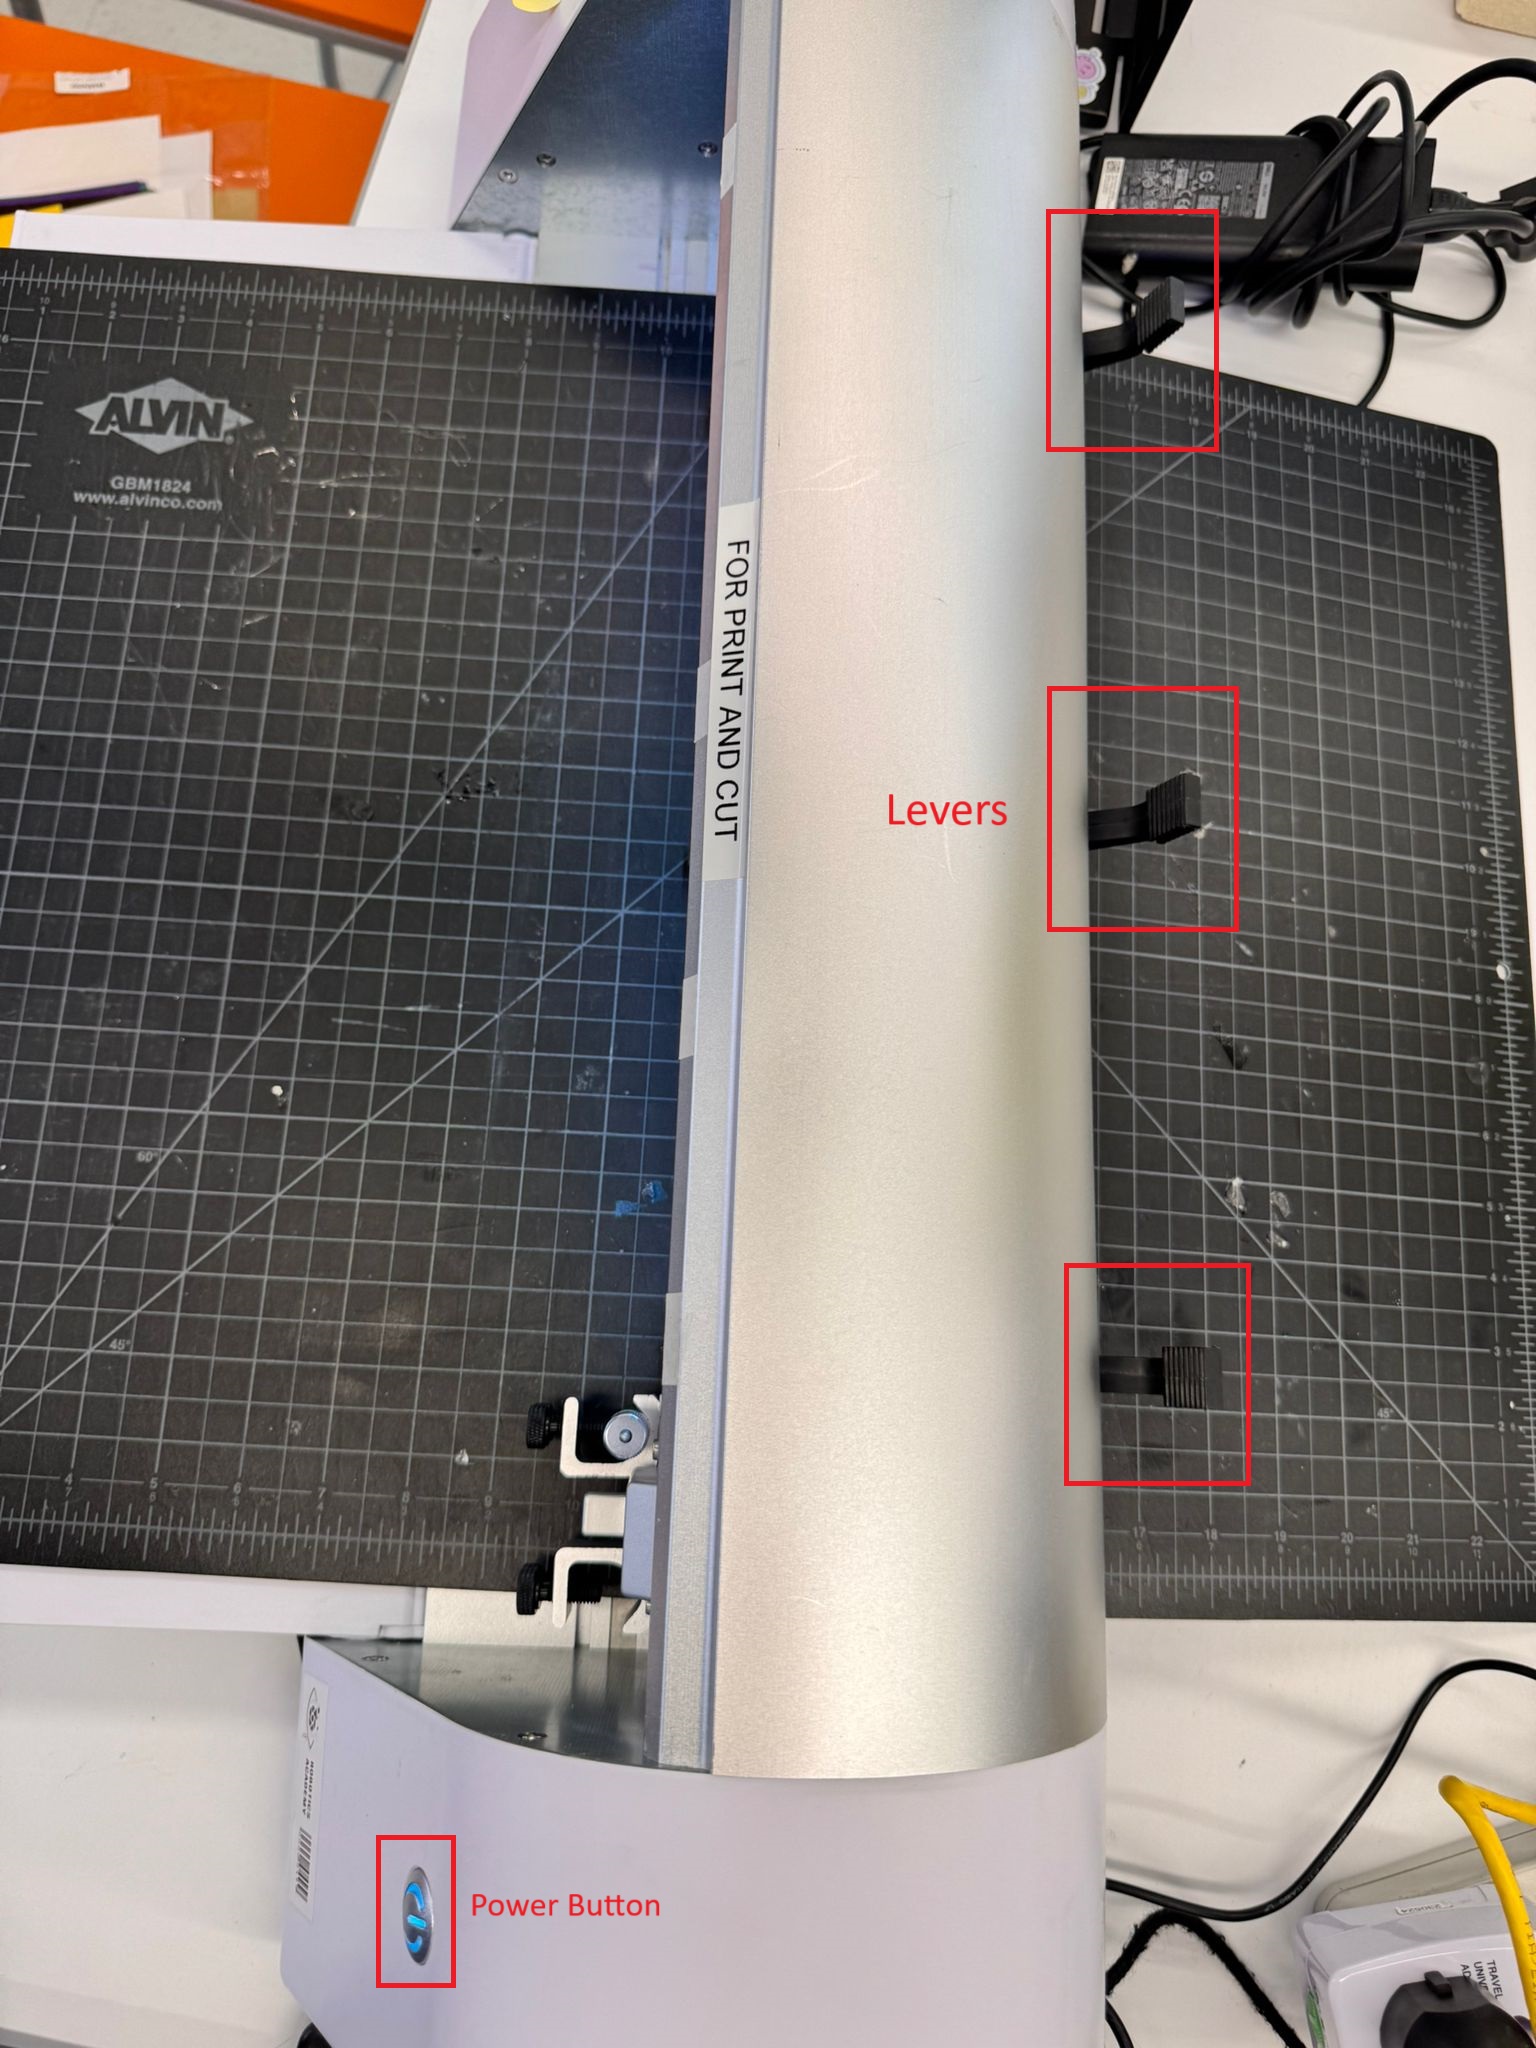
- Put the cutting mat under the wheels.
- Put levers down.
- Wait for the KNK lights to turn white.
- Open WIFI settings from the PC and connect knk_force.
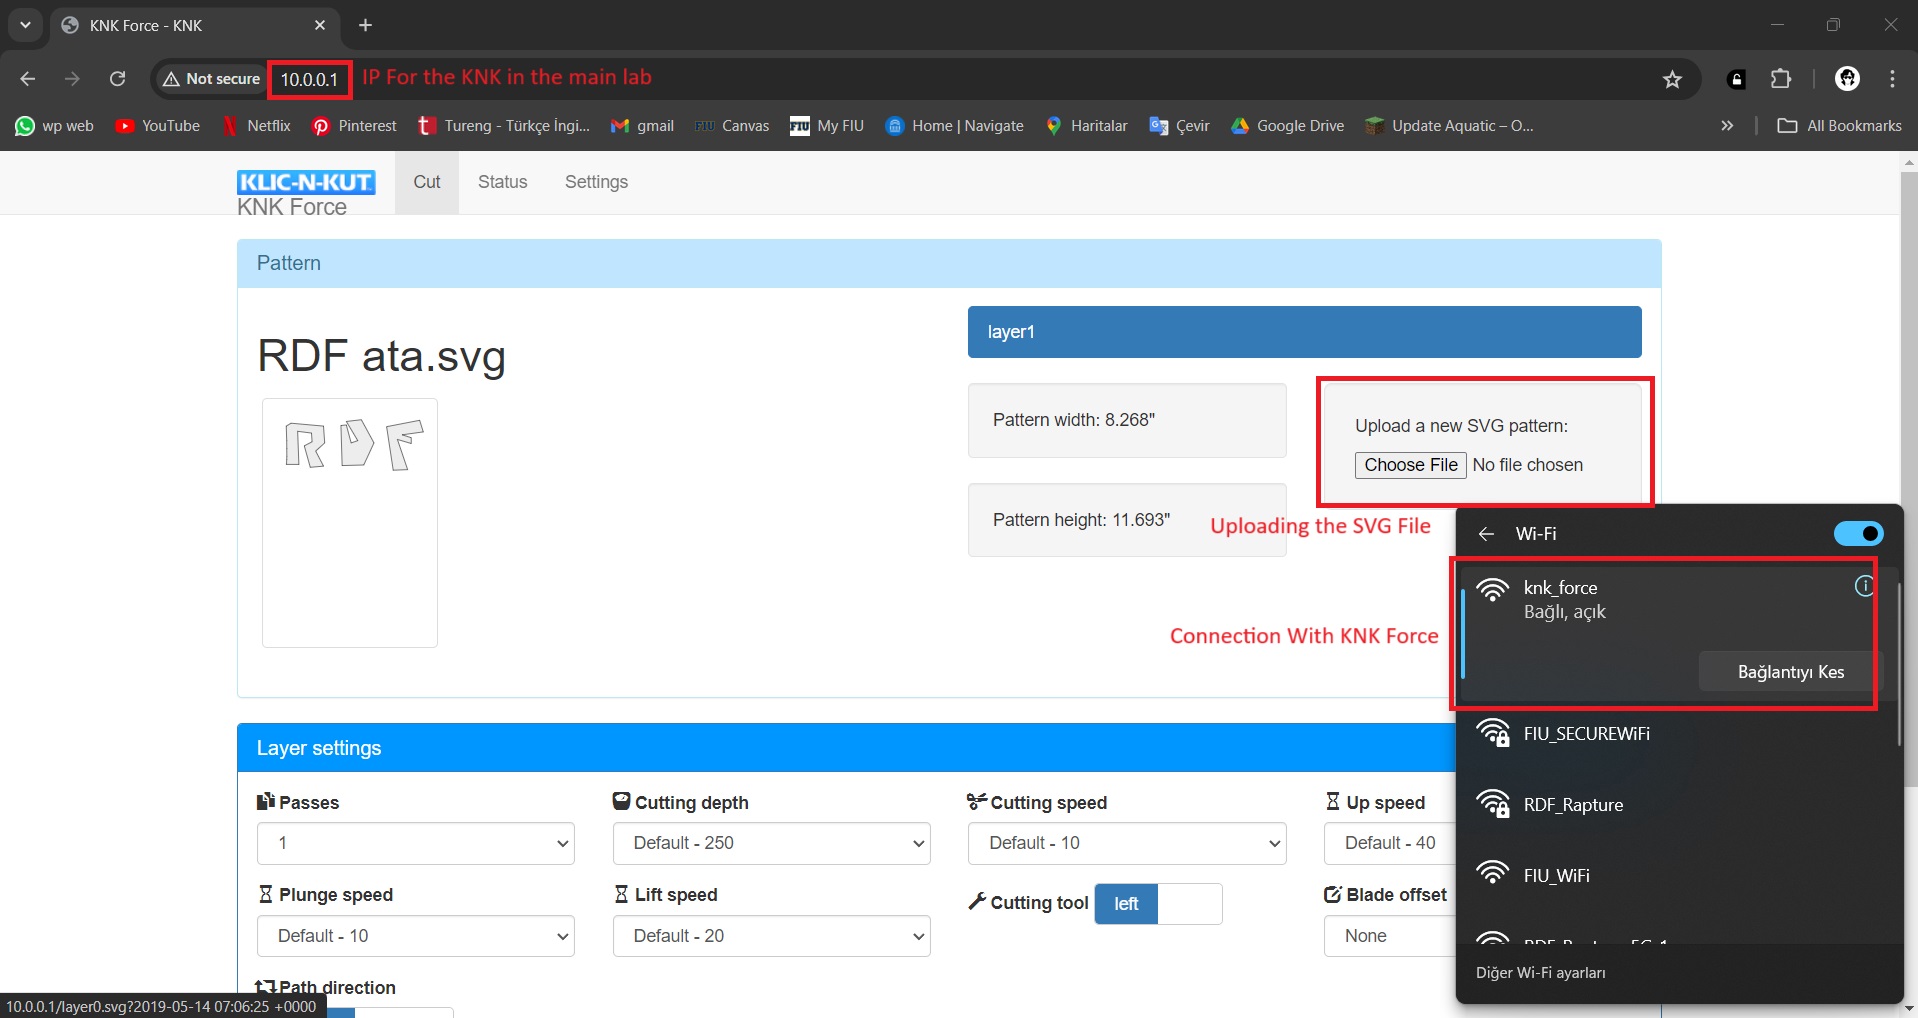
- Open a browser and put the IP address.
- Upload SVG.
- Calibrate the Cutting tool.
- Put Vinyl Paper on the cutting mat and tape it.
- Prepare and send.
First Cut:
- You’ll need an IP Address to start cutting. (The KNK with “Print and Cut sticker” has 10.0.0.1 as an IP).
- IP address can be obtained by:
- Plug an Ethernet into the machine and the PC.
- Run Command Prompt on PC.
- Type ipconfig and see the results of the Ethernet Cable.
- Or
- Connect KNK to WIFI.
- Connect to the KNK via WIFI.
- Download Angry IP and search for the device.
Cutting:
- After you get the IP, type it into your search engine.
- An Interface for KNK will show up.
- Prepare a design from Inkscape for cutting.
- After designing in Inkscape, follow File>Save As…>[Name of your file] and select .svg.
- Open up the browser again and select “Upload a new SVG pattern:”
- Select your design and wait for the upload. Then return to the main page.
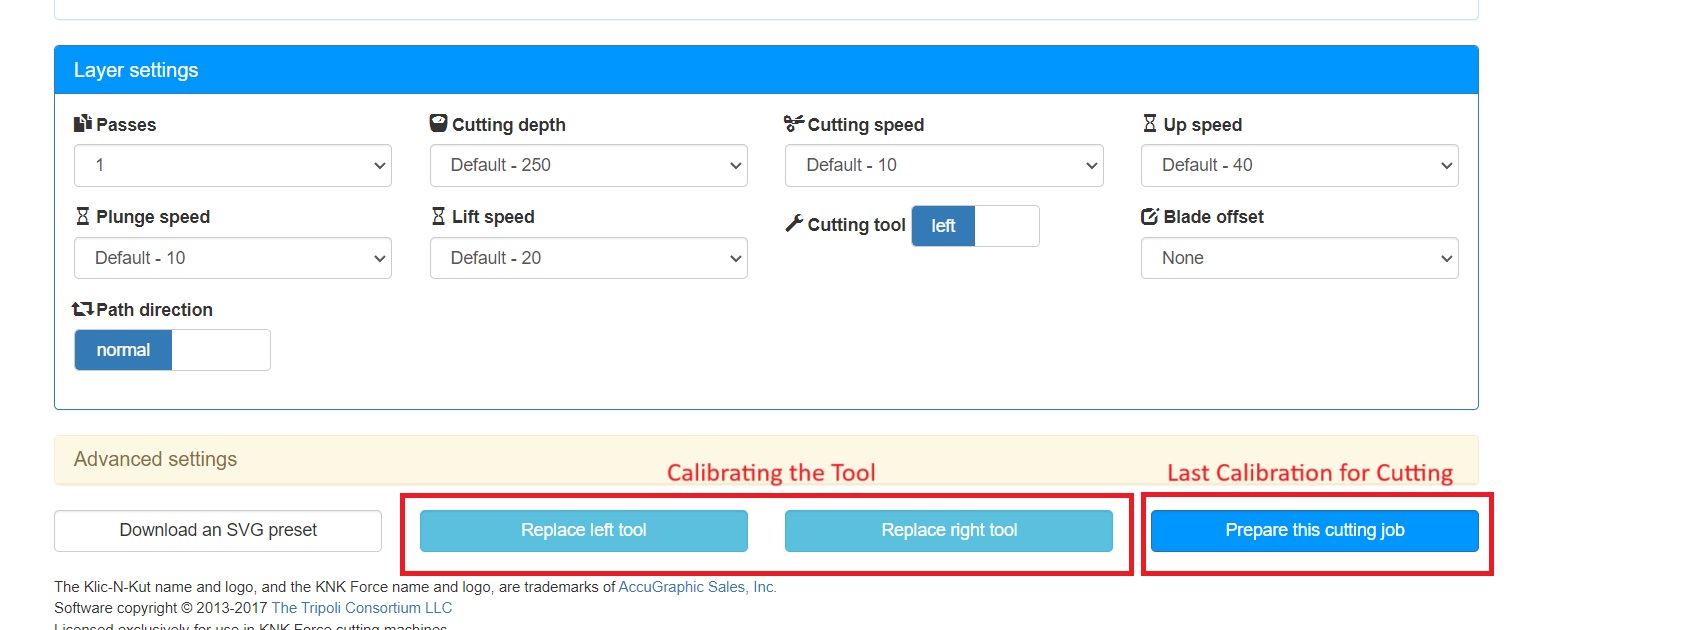
- Set up your tool (see instructions below)
- Place your mat and material. Check Article 1.10 in the Official Handbook.
- Select “Prepare this cutting job”
- Adjust the starting position of your KNK using arrows and numpad (Depends on the mat and material size)
Setting up the Cutter/Pen tool:
- Setup for the tool is needed after EVERY TIME you turn KNK on.
- In the browser UI, select the replace left tool (ALWAYS use the left slot for single tool)
- Take every tool out if they were left there in the previous session and click continue
- Put the tool back in and adjust the screws.
- The tool is set up! For pen or blade tension and adjustments, make sure you read Article 1.08 in the Official Handbook.
Recovery Mode:
Getting the device into recovery mode:
- Unplug the WIFI adapter and plug the ethernet cable
- Turn on the KNK and wait for the red light (might take 1-2 minutes)
- Take the ethernet cable out and back in. Also, plug the WIFI adapter this time
- Wait for the lights to turn green
- Now the device is in recovery mode
Setting up a KNK with recovery mode:
- Select the KNK_Force_Recovery network from WIFI connections. A page will open up on the screen
- Select LAN if you want to continue the connection with ethernet
- Save the changes and click continue
- An IP address will open up.
- Connect to your regular WIFI network and refresh your KNK connection
- It is connected and you are all set!